
Classic Motorcycle Mechanics magazine 2011
This article appeared in Classic Motorcycle Mechanics magazine (UK) and Redaktion Oldtimer Praxis magazine (Germany) in July 2011.
Words and pics: Phillip Tooth – www.torquewrite.com
Shell out on new bearings
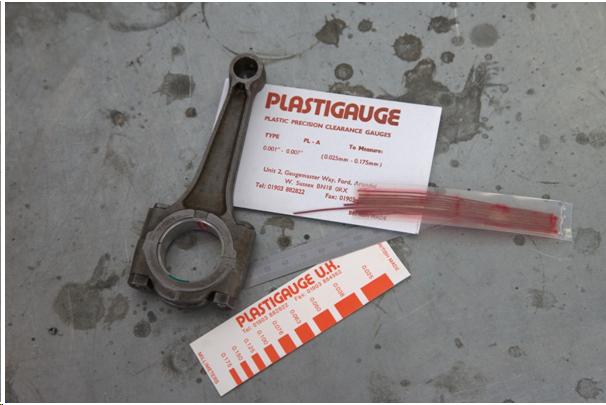
When this Honda 400/4 crankshaft needed new main and big end bearings we used Plastigauge to make sure that it would spin freely in the crankcase.
When your big ends start knocking and your footpegs start vibrating it’s time to strip your engine. The knocking is caused by excessive wear between the connecting rods and the crankshaft. Most modern four-strokes use plain big end bearings, which are also known as white metal bearings. These are made of replaceable steel shells, which are keyed to the bearing caps. The inner surface of the steel shell is plated with a coating of bronze, and this in turn is coated with a thin layer of Babbitt metal. The Babbit metal, which may be 90% tin with the remaining 10% a mixture of copper and antimony, is the bearing surface. It is easily scratched, so be careful how you handle plain bearing shells.
If there is too much clearance between the crank and the bearing surface, whether caused by wear or using the wrong size replacement bearing shells, the oil pump may not be able to deliver enough lubricant under high enough pressure. And if that happens, your bearings will fail again.
The normal oil clearance in a big end or main bearing is approximately one part in 2000 of the diameter (check the figure in your workshop manual) so if your crankshaft journal has a diameter of 40.00mm then there should be a clearance of approximately 0.02mm. The good news is that plain bearings are designed to be sacrificed to save the crankshaft journals and the connecting rod big ends. They are easy to replace, and come in a range of under-sizes to account for wear in the crankshaft journals. Here’s how we did replaced the crankshaft bearings in a Honda 400/4.
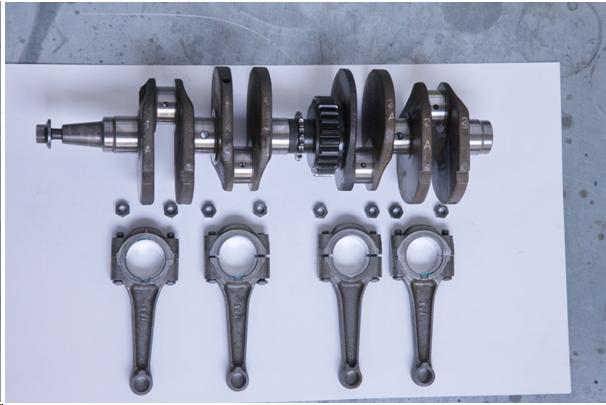
 Dismantle engine and wash crankshaft with kerosene, then dry. Inspect the journals for scoring – light scoring can be removed with emery cloth – and measure the diameter with a micrometer.
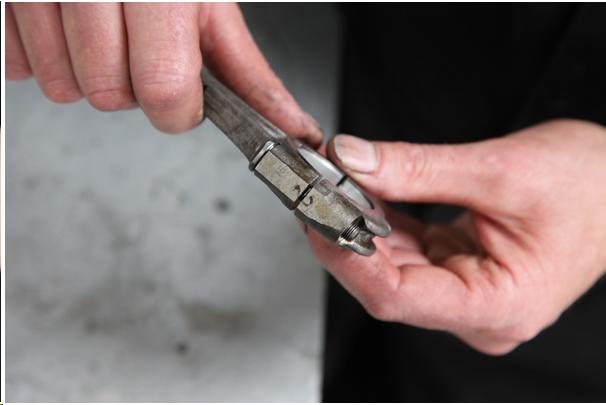 Connecting rods have 1, 2 or 3 engraved on the eye to indicate the outside diameter of the bearing, which is 35mm plus up to +0.024mm oversize to allow for variation in manufacture.
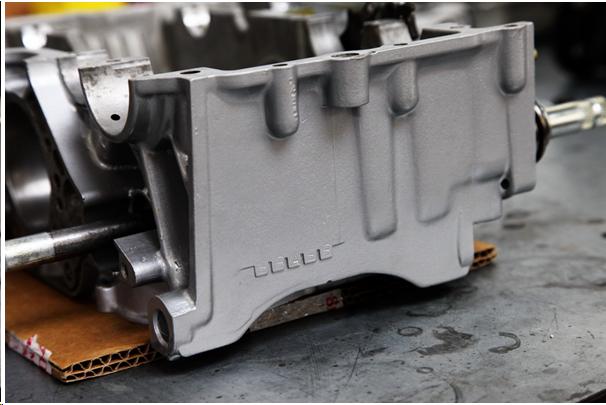 There are five crankshaft journals. Honda indicates the correct outside diameter of each main bearing by letters stamped on the rear lower half of crankcase, in this case BBABB.
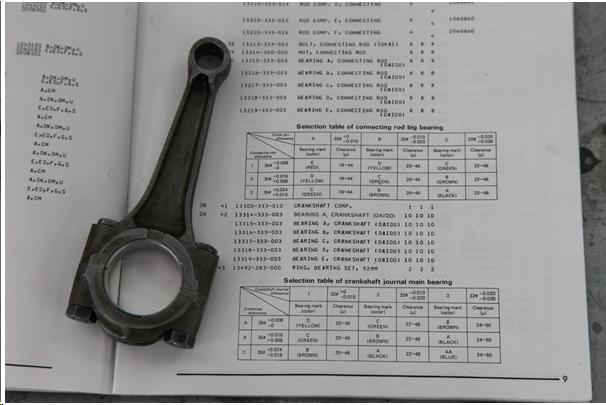 Honda parts book lists available bearings for crankshaft and big ends. Outside diameter does not change, but inside does. Undersize shells allow for up to -0.030mm wear.
 The colour coded bearing shell has a tab to locate it in the groove in the bearing housing. Smear a drop of oil on the back of the shell before springing it into place.
 White metal shell bearings are pre-finished to give correct clearance. Under no circumstances should the bearing be scraped or the end cap joint faces filed.
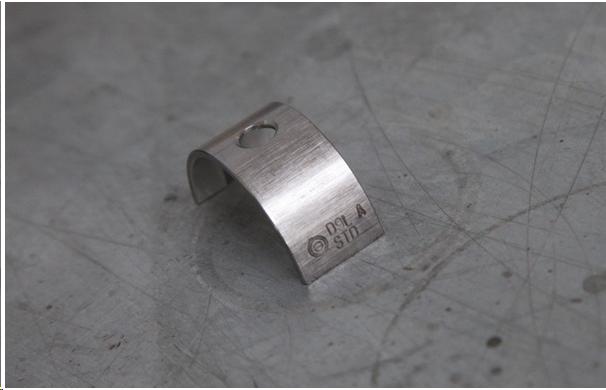
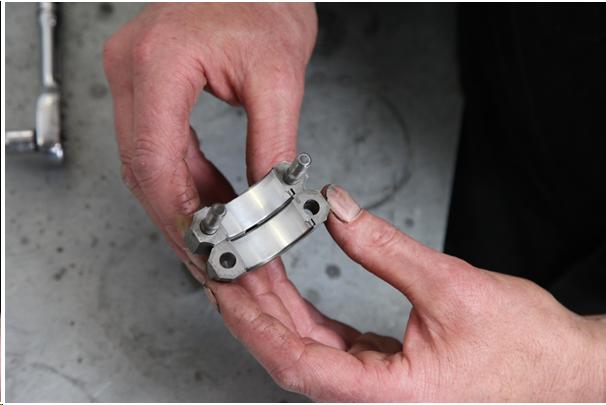 The part number stamped on the outside of the bearing shell does not indicate the size – for that you need to look at the colour code. The hole lines up with oil feed in the crankcase. Your micrometer reading will indicate which size of replacement big end shells you will need. Always keep the rod and cap as a pair, and refit to their original journals.
 Cut a length of Plastigauge and lay width-ways on the journal. Assemble big end bearing, making sure nuts and bolts are clean and lightly oiled for an accurate torque reading.
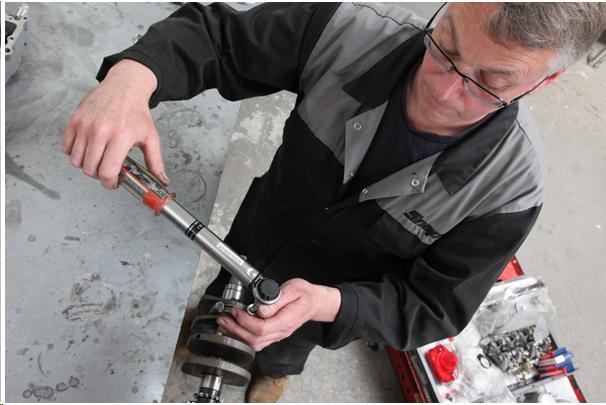
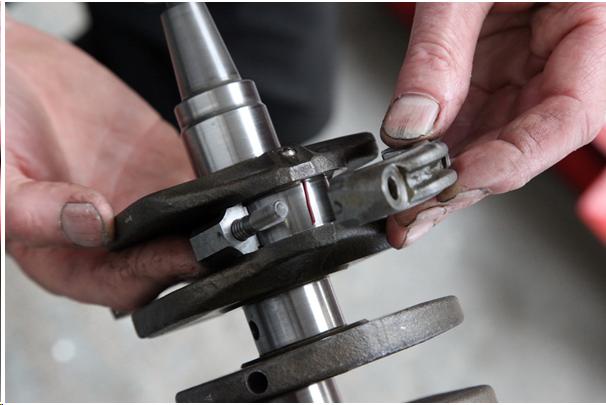 Finger-tighten the big end nuts and bolts and then use a torque wrench, tightening one turn at a time, to the correct torque figure given in the handbook.
 Take care not to turn the rod or the crank as it will smear the Plastigauge and give a false reading. Carefully remove the big end assembly to reveal the squashed Plastigauge.
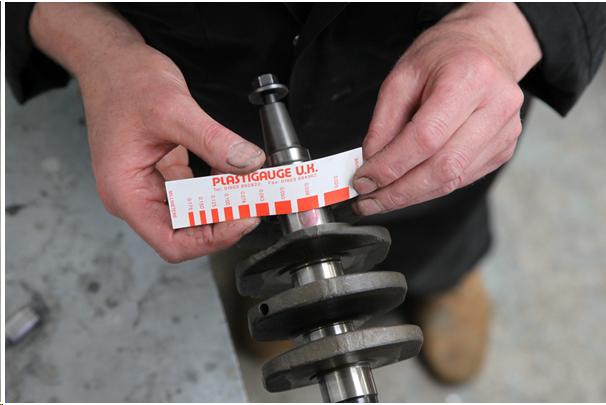 Match the width of squashed Plastigauge to the calibrated bars on the gauge provided in the kit (one side in fractions of an inch, the other in metric). We have 0.038mm clearance.
 A Honda crank has production tolerances of between 0.018 and 0.048mm bearing clearance. Maximum wear of 0.08mm is corrected by undersize bearings. Our crank is within limits.
The product used in this article is Plastigauge PL-A
With thanks to Ashley - www.classicbikerestorations.net
Squeeze me!
You can’t stick a feeler gauge between a big end bearing and the crankshaft journal to measure the oil clearance. So what do you do? Like all brilliant ideas, the principle behind Plastigauge is simple – the tighter you squeeze a cylinder of soft plastic material, the thinner it gets and the more it spreads. If you know the diameter of the cylinder at the start, and how wide it spreads, you can work out how thick the compressed material is and so measure the clearance between two surfaces. Different Plastigauge kits measure clearances from between 0.018mm – 0.045mm right up to 0.025mm – 1.75mm.
Handle the Plastigauge material carefully, use a sharp knife to cut a piece the width of the journal and hold it in place with a smear of grease. The manufacturer recommends putting a smear of silicone release agent on the shell. You can check a journal has not worn oval by placing four pieces of Plastigauge around the journal and comparing the readings. The squashed Plastigauge can be removed with a clean oily cloth or a de-greasing solvent. Plastigauge is soluble in oil, so any small pieces left behind should not harm the engine in any way.
 Besides measuring the clearance between main bearing or big end shells and crankshaft journals, you can also use Plastigauge to measure the clearance between the camshaft and bearing surfaces, or high spots between cylinder heads and barrels. If you can’t use a feeler gauge, try a Plastigauge